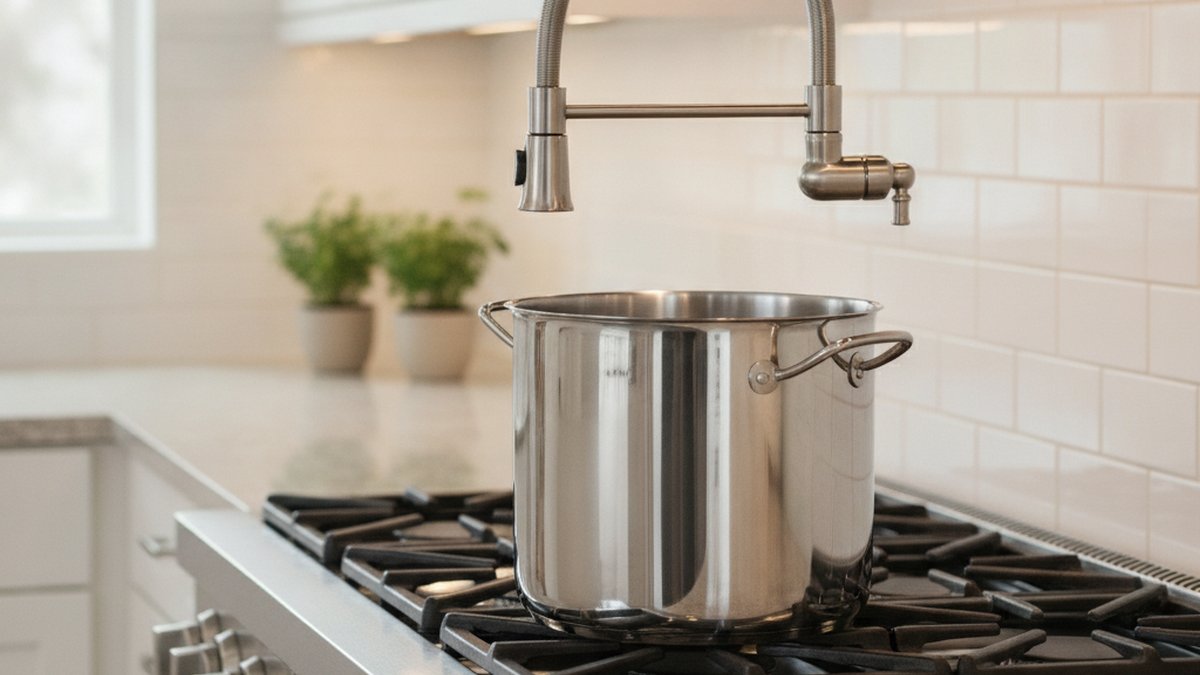
A pot filler tap above stove setups are those swing-out faucets you see mounted on the wall right behind the range, so you can fill a pasta pot or stockpot exactly where it’s going to boil — no more carrying eight pounds of water across the kitchen. They’re one of those upgrades that look like pure luxury but genuinely earn their keep in the right kitchen. Below, I’ll walk you through who actually benefits, what they cost, how they get plumbed, the finishes and styles that hold up, and the mistakes that turn a great idea into a leaky regret.
What exactly is a pot filler tap above the stove, and how does it work?
A pot filler is a cold-water-only faucet mounted on the wall (or occasionally a deck) directly above your cooktop. It has a double-jointed articulating arm that folds flat against the wall when you’re not using it and swings out over any burner when you need to fill a pot. You turn it on, fill the pot right on the stove, turn it off, and fold it away.
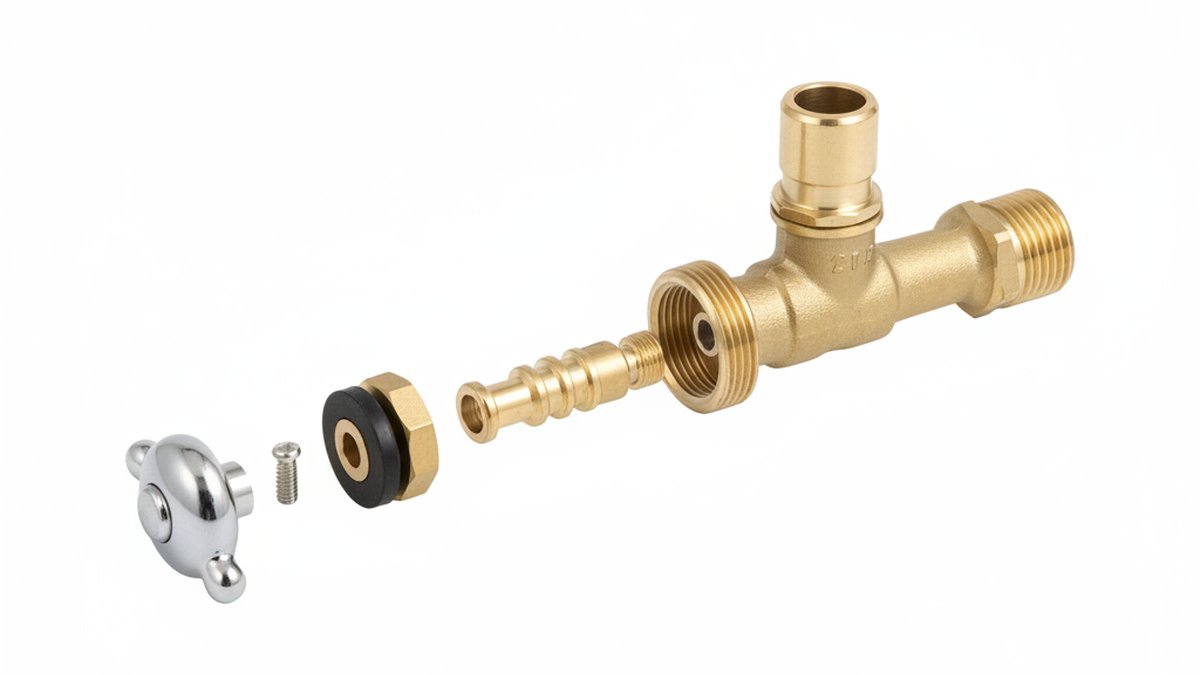
The key mechanical detail: a good pot filler has two shut-off valves — one at the wall base and one at the spout tip. That dual-valve design isn’t a gimmick. It lets you leave the line pressurized but shut the tip valve, so a bumped handle doesn’t flood your stovetop, and it makes the swing arm safer around an open flame. Most pot fillers are cold-water only because you’re filling a pot you’re about to heat anyway — running a hot line to the stove adds cost and scald risk for almost no benefit.
Reach matters more than people expect. A single-jointed arm reaches roughly 15–20 inches; a double-jointed arm reaches 20–24 inches and can cover both front and back burners. If you have a wide range or a cooktop with back burners set far from the wall, measure before you buy — a short arm that only reaches the front burners is a daily annoyance.
Do I really need a pot filler, or is it a waste of money?
You need one if you cook big-batch meals regularly — pasta, stock, canning, boiling seafood, or filling a kettle you keep on the stove — and your sink is more than a few steps from the range. In that scenario, a pot filler saves your back and your floors every single week. If you rarely fill anything bigger than a saucepan, or your sink is right beside the stove, it’s a splurge you’ll admire but barely use.
Here’s the honest breakdown of who benefits:
- Worth it: Home cooks who boil large pots weekly, anyone with a galley or island layout where the sink and stove are far apart, home canners, and people with mobility or wrist issues who can’t safely carry a full stockpot.
- Nice-to-have: Resale-minded remodelers in mid-to-high-end homes, where buyers now expect one and it photographs well in listings.
- Skip it: Renters, tiny kitchens with the sink beside the range, and light cooks — the plumbing cost outweighs the payoff.
One thing people forget: a pot filler only fills. It can’t drain, rinse, or wash. So it never replaces your main kitchen faucet — if that’s leaking or underperforming, fix that first. (If yours drips, here’s how to fix a leaking kitchen faucet yourself without calling a plumber.)
How much does it cost to install a pot filler tap above the stove?
Total realistic cost is $300–$900 installed: roughly $150–$500 for the faucet itself and $150–$400 in labor, depending on whether a water line already runs near the stove. The single biggest cost driver is the plumbing, not the fixture.
If your kitchen is being gutted or the wall behind the stove is open, running a new cold line is cheap and easy — the plumber can tap into a nearby supply in an hour. If you’re retrofitting into a finished wall, someone has to open the drywall or tile, run the line, add a shut-off, and patch it back. That’s where costs climb, especially through tile.
| Scenario | Typical faucet cost | Typical labor | Total range |
|---|---|---|---|
| New build / wall open during remodel | $150–$500 | $100–$200 | $250–$700 |
| Retrofit into drywall backsplash | $150–$500 | $200–$350 | $350–$850 |
| Retrofit behind existing tile | $150–$500 | $300–$450 | $450–$950+ |
A budget under $200 gets you a solid stainless or chrome pot filler from a reputable maker. Spending $300–$500 buys you a heavier valve body, ceramic-disc cartridges rated for hundreds of thousands of cycles, and premium finishes like matte black or brushed gold that resist wear. Below about $80, you’re gambling on plastic internals and thin plating that pits within a couple of years — not what you want feeding a line inside your wall.
Where should a pot filler be mounted above the stove?
Mount the base 18–24 inches above the cooktop surface, centered over the burners you use most, with the arm folded clear of any overhead range hood or microwave. That height clears a tall stockpot while keeping the arm within easy reach and away from direct flame.
A few placement rules that save headaches:
- Center it over the largest burner — usually the front-left or a center power burner — since that’s where big pots sit.
- Keep the folded arm at least a few inches below the hood or microwave so it stows completely flat.
- Don’t mount it so low that a tall pot won’t fit under the spout; test with your biggest stockpot before the plumber finalizes the height.
- Make sure the swing arm clears cabinet edges on either side when fully extended.
- Slope matters: the line should be installed so it drains slightly back — in freeze-prone exterior walls, a pot filler on an outside wall risks freezing, so interior-wall mounting is safer.
That last point is real. A supply line in an exterior wall behaves like an outdoor spigot in a cold snap. If you’ve ever dealt with a frost-free faucet that won’t turn off, you know winterizing a wall-mounted valve is not something to improvise — keep pot filler lines on interior walls whenever possible.
What finish and style of pot filler holds up best above a stove?
Above a stove, choose a finish that shrugs off grease, steam, and fingerprints — brushed/satin nickel and matte black are the most forgiving, while polished chrome shows every splatter but wipes clean easily. Match the finish to your main kitchen faucet and cabinet hardware so it reads intentional, not tacked-on.
Here’s how the common finishes actually perform in the splatter zone right behind a range:
| Finish | Hides fingerprints/grease? | Ease of cleaning | Best for |
|---|---|---|---|
| Brushed / satin nickel | Excellent | Easy — no visible streaks | Busy family kitchens |
| Matte black | Good (shows dust/lime, not grease) | Wipe with damp cloth; avoid abrasives | Modern, high-contrast kitchens |
| Polished chrome | Poor — shows splatter | Very easy to wipe clean | Classic, budget-friendly builds |
| Brushed gold / champagne bronze | Very good | Easy, but protect the coating | Warm, statement kitchens |
| Stainless | Good | Easy, pairs with steel ranges | Pro-style stainless kitchens |
One cleaning warning that applies right here: never reach for bleach or harsh abrasives to clean a plated finish above the stove, especially on chrome or coated golds. It strips and pits the coating fast — see whether bleach on a chrome faucet ruins the finish before you scrub. Warm soapy water and a microfiber cloth is all a pot filler ever needs.
Should the pot filler match my kitchen faucet exactly?
It should match closely, but it doesn’t have to be from the same brand or line — just keep the finish family consistent. A brushed-nickel pot filler with a brushed-nickel main faucet looks deliberate even if they’re different models. Mixing warm and cool finishes (matte black pot filler over a chrome main faucet) reads as a mistake unless the rest of your hardware deliberately mixes metals. If you’re still choosing your primary faucet, our guides on the best pull-out kitchen faucet Delta makes and which black touchless kitchen faucet to buy can help you lock in a finish first, then match the pot filler to it.
Single-jointed vs. double-jointed pot filler: which should I buy?
Buy a double-jointed pot filler if your range is 36 inches or wider, or if you want to reach the back burners — the second joint adds the extra reach and lets the arm fold fully flat. A single-jointed model is fine and slightly cheaper for a standard 30-inch range where you only fill pots on the front burners.
- Single-jointed: One pivot, ~15–18″ reach, folds flat but covers less area. Best for narrow ranges and tight budgets.
- Double-jointed (articulating): Two pivots, ~20–24″ reach, folds into a compact profile, covers front and back burners. The better choice for most modern kitchens and the one most people are happier with long-term.
Whichever you pick, prioritize the valve internals. Look for solid brass construction and ceramic-disc cartridges rather than rubber washers — ceramic discs are the difference between a lifetime of drip-free use and a valve that weeps within two years. If your faucet ever does start dripping, ceramic cartridges are also far easier to service than old washer-and-seat designs.
Common pot filler problems (and how to avoid them)
The most common pot filler complaints are drips at the spout, a stiff or sagging arm, and — worst case — a slow leak inside the wall. Almost all of them trace back to either a cheap cartridge or a rushed installation, both of which are avoidable.
Watch for these:
- Dripping tip valve: Usually a worn cartridge or debris on the ceramic disc. Shut the base valve, unscrew the tip, clean or replace the cartridge. A quality unit rarely drips in the first several years.
- Sagging arm that won’t stay folded: The joints need enough friction; better fillers use tension washers you can tighten. Cheap ones sag and can’t be adjusted.
- In-wall leak: The scary one. It comes from a poor solder joint or a loose supply connection behind the mounting plate. Always have a licensed plumber pressure-test the connection before the wall is closed up.
- Freeze damage: Only an issue on exterior walls — another reason to mount on an interior wall.
Because the supply connection lives inside a finished wall, this is one faucet where I’d steer most people toward professional installation, or at least a plumber to run and pressure-test the line even if you mount the fixture yourself. A dripping visible faucet is annoying; a slow leak inside your backsplash wall is expensive.
How do I install a pot filler tap above the stove?
At a high level: run a cold-water supply line to a point centered above the cooktop, add a shut-off valve, mount the pot filler’s backplate to solid blocking in the wall, connect and pressure-test the line, then patch and finish the wall. Here’s the realistic sequence.
- Plan the location. Center over your main burner, 18–24″ above the cooktop, on an interior wall.
- Open the wall (or work with it open during a remodel) and add wood blocking between studs so the heavy brass fixture has something solid to anchor to.
- Run a ½” cold supply line from the nearest source, with a dedicated shut-off valve so you can service the filler without killing water to the whole kitchen.
- Mount the backplate and connect the filler, using thread sealant on the connections.
- Pressure-test before closing the wall. Turn the water on, cycle the valves, and check every joint for weeping. This step is non-negotiable.
- Patch and finish the drywall or tile around the escutcheon.
If any of that makes you nervous — especially the in-wall soldering and pressure test — hire it out. This is a “measure twice, open the wall once” job.
Author note & why you can trust this guide
This guide was written by the product team at aleashafaucet, where we design, test, and sell kitchen and bath fixtures full-time. We bench-test pot filler valves for drip resistance and cycle life, and we build to recognized plumbing standards (look for cUPC/NSF-listed fixtures and lead-free brass compliant with the U.S. Safe Drinking Water Act). Our pot fillers ship with a limited lifetime warranty on the finish and cartridge, because a fixture that lives inside your wall should be one you never have to think about again. We only recommend specs we’d install in our own kitchens.
Not sure which brand to trust for the rest of your kitchen? Our head-to-head on whether a Moen faucet is better than Delta uses the same testing approach and pairs well with choosing a matching pot filler.
FAQ
Is a pot filler cold water only, or does it have hot water too?
Almost all pot fillers are cold-water only. Since you’re filling a pot you’re about to heat anyway, a hot line adds cost, scald risk, and complexity for essentially no benefit. If you specifically want warm water at the stove, a few dual-line models exist, but they’re uncommon and rarely worth it.
Can I add a pot filler to my existing kitchen without a remodel?
Yes, but it’s a retrofit job: a plumber has to open the wall behind the stove, run a cold line to it, add blocking and a shut-off, then patch. It’s very doable — expect $350–$950 depending on whether you have drywall or tile — but it’s more involved than swapping a countertop faucet.
What height should a pot filler be above the stove?
Mount the base 18–24 inches above the cooktop surface, centered over your main burner. Test with your tallest stockpot before finalizing — the spout needs to clear the pot, and the folded arm needs to clear any range hood or microwave above.
Do pot fillers leak or cause water damage?
A quality pot filler with ceramic-disc cartridges and a properly pressure-tested in-wall connection rarely leaks. Problems come from cheap valves or rushed installs. The dual-valve design (base plus tip) specifically reduces the risk of accidental flooding on the stovetop. Always pressure-test the connection before closing the wall.
Does a pot filler add value when I sell my home?
In mid-to-high-end homes, yes — buyers increasingly expect one, and it’s a strong photo feature in listings. In modest homes or tiny kitchens, the resale bump is smaller than the install cost, so install it for your own use rather than purely for resale.