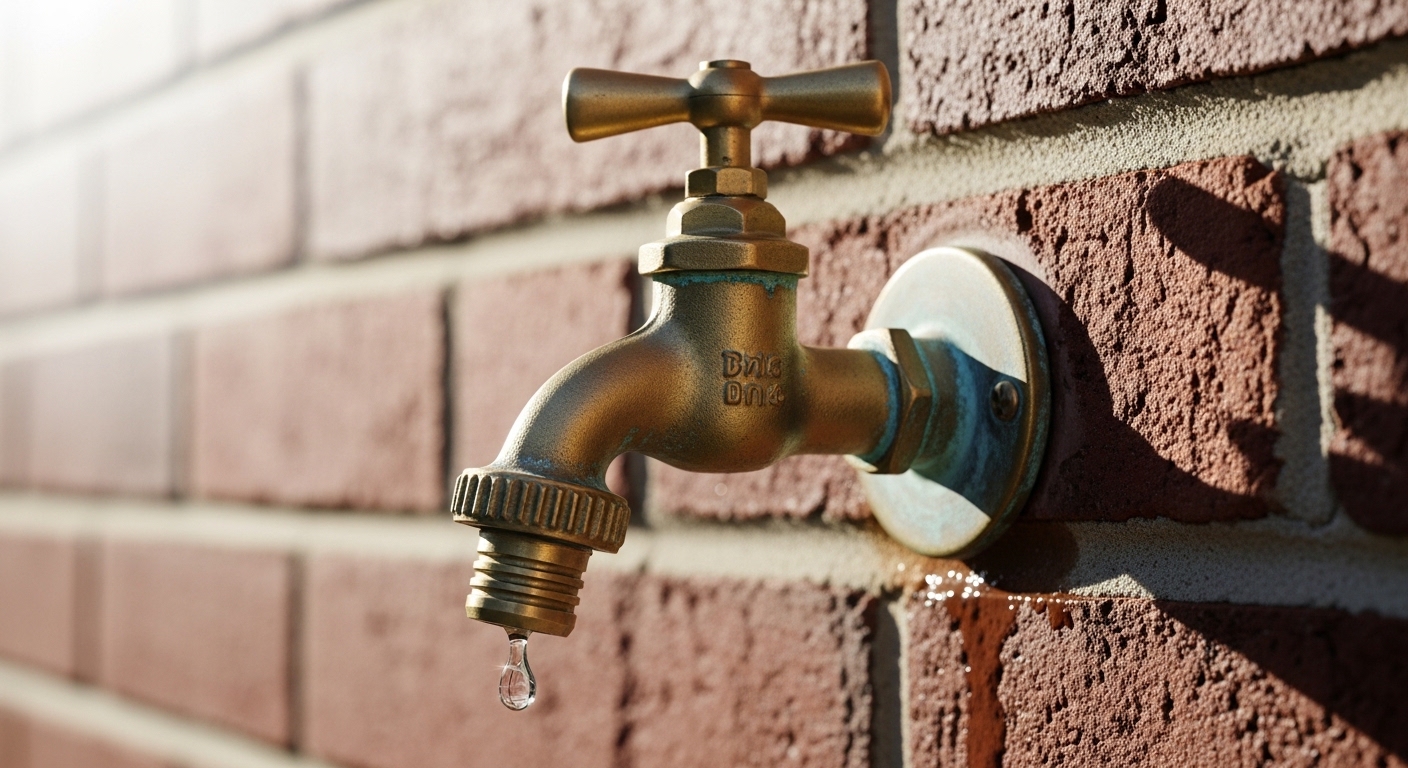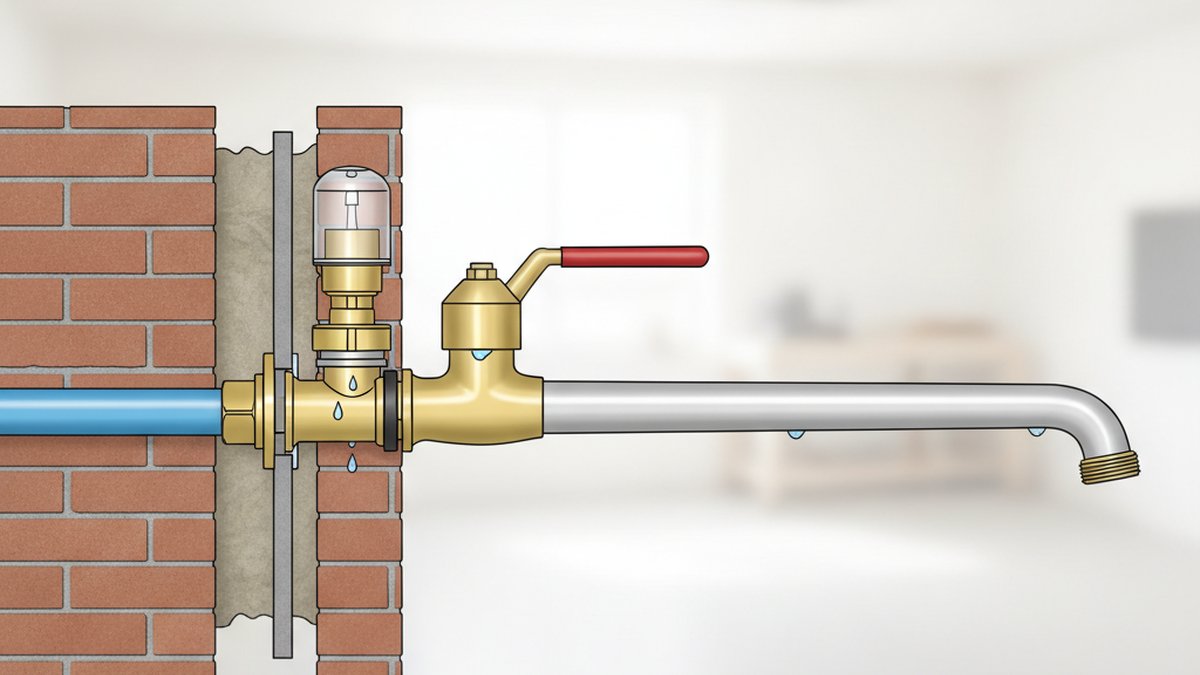
If your outdoor frost free faucet won’t turn off — you crank the handle all the way clockwise and water keeps trickling (or gushing) out of the spout — you’re dealing with a failed seal at the very back of the valve, deep inside your wall. The good news: this is one of the most fixable plumbing problems there is, and you almost never need a plumber. A frost-free (also called “freeze-proof” or “sillcock”) hose bib has a long stem that runs 6 to 12 inches back through your wall so the actual shut-off happens indoors where it’s warm. That length is what protects it from freezing — but it also means the part that’s failing is hidden, which is why people assume it’s broken when it usually just needs a $2 washer.
Below I’ll walk you through exactly why this happens, how to tell which part failed, and how to fix each cause yourself — with the specific tools, torque, and part numbers that actually matter.
Why won’t my frost-free outdoor faucet shut off even when the handle is fully closed?
It won’t shut off because the rubber stem washer at the far end of the stem is no longer sealing against the brass valve seat. On a frost-free sillcock, turning the handle doesn’t move a part near the spout — it screws the long stem forward until a washer at the very back presses into a seat inside the warm part of your house. When that washer hardens, tears, or falls off, there’s nothing left to block the water, so it keeps flowing no matter how hard you tighten the handle.
Three failures cause 95% of “outdoor frost free faucet won’t turn off” complaints:
- Worn or missing stem washer — the #1 cause. The rubber flattens, cracks, or the tiny brass screw holding it lets go. Water keeps running steadily.
- Damaged or scaled valve seat — hard-water mineral buildup or corrosion pits the brass seat so even a new washer can’t seal against it. You’ll get a persistent thin stream.
- Stripped stem threads or packing — the handle spins loose with no resistance, or water leaks out around the handle stem itself. Here the whole stem assembly is shot.
One more culprit people miss: a stuck or debris-clogged vacuum breaker on top of the faucet. That won’t cause the spout to run, but it can cause water to spit or dribble from the top cap, which people confuse with “won’t turn off.” I’ll cover that below too.
How do I know if it’s the washer, the seat, or the whole stem?
Diagnose by feel and by flow before you touch a tool — it tells you which repair path to take. Here’s the quick read:
| Symptom | Most likely cause | Fix | Cost / time |
|---|---|---|---|
| Handle tightens firmly but a steady stream keeps flowing from spout | Worn/torn stem washer | Replace stem washer | ~$2 / 20 min |
| New washer installed, still a thin trickle | Pitted or scaled valve seat | Reface or replace seat, or swap full stem | ~$15 / 45 min |
| Handle spins freely, no resistance at any point | Stripped stem threads | Replace entire stem cartridge | $15–$30 / 45 min |
| Water leaks around the handle when open | Failed packing nut/washer | Tighten or replace packing | ~$3 / 15 min |
| Water dribbles/spits from the cap on top of faucet | Faulty vacuum breaker | Replace vacuum breaker cartridge | ~$10 / 15 min |
Simple field test: shut the handle fully and watch the spout for 30 seconds. A steady, even flow points to the washer or seat. A flow that changes when you wiggle the handle points to a loose washer screw or worn stem. No resistance at all when turning means the threads are gone. This same logic applies to indoor fixtures too — the diagnostic mindset in our guide on fixing a leaking kitchen faucet yourself is exactly the “isolate which seal failed” approach you want here.
How do I replace the washer on a frost-free faucet that won’t turn off?
Shut off the water, unscrew the packing nut, pull the entire stem straight out the front, and swap the washer on the end — the whole job takes about 20 minutes with two wrenches. Because a frost-free sillcock is designed to be serviced from outside, you don’t open any walls. Here’s the step-by-step:
- Shut off the water supply. Find the shut-off valve on the pipe feeding this faucet indoors (basement, crawlspace, or utility room). No dedicated valve? Shut off the main. Then open the outdoor faucet to drain residual pressure.
- Remove the handle. Unscrew the screw in the center of the handle and pull it off the stem.
- Loosen the packing nut / bonnet nut. This is the large hex nut right behind the handle. Use an adjustable wrench or a socket. Turn counterclockwise. Hold the faucet body steady with a second wrench so you don’t twist the pipe inside the wall.
- Pull the stem straight out. Once the nut is off, the entire long stem — often 8–12 inches — slides out the front. If it resists, keep turning the handle end to “unthread” it as you pull.
- Inspect and replace the washer. At the far tip you’ll find a brass screw holding a rubber washer (usually a flat or beveled washer sized 1/4″ to 1/2″). Remove the screw, replace the washer with an exact match, and reinstall the screw snugly. If the brass screw is corroded, replace it too.
- Grease and reassemble. Wipe a light film of silicone plumber’s grease on the stem threads and O-ring. Slide the stem back in, hand-thread it, then snug the packing nut — firm, not gorilla-tight. Reattach the handle.
- Turn the water back on slowly and test. Open and close it a couple of times to confirm a clean shut-off.
Two things people get wrong here. First, they buy a random washer instead of matching the exact diameter and thickness — an oversized washer won’t seat and an undersized one leaks immediately. Bring the old one to the store or match the manufacturer’s kit. Second, they overtighten the packing nut, which crushes the packing and makes the handle stiff. If your washer sits against a seat inside the wall rather than on the stem, the technique for cleanly extracting and matching it is the same one covered in our walkthrough on removing an old tap seat that’s stuck or corroded.
What if I replace the washer and the outdoor faucet still won’t turn off?
If a fresh washer doesn’t stop the flow, the brass valve seat it presses against is pitted or scaled — the washer can’t form a tight seal against a damaged surface, so water sneaks past. This is common in hard-water regions where mineral scale builds up on the seat over years. You have three options:
- Reface the seat with a seat-dressing (reseating) tool if the seat is fixed and not removable — it grinds the brass flat again. Cheap, but only works on non-replaceable seats.
- Replace a removable seat using a seat wrench (a squared/hex tool) if your faucet has a threaded seat.
- Replace the entire stem cartridge — on most modern frost-free sillcocks (Woodford, Prier, Mansfield, Aqua-Free) the seat and washer live on a single serviceable stem, so swapping the whole stem is the cleanest fix and restores it to like-new.
Swapping a full stem cartridge is the same principle as any cartridge repair — remove the old one, match the exact model, seat the new one, done. If you’ve never done it, watching a real one first helps enormously; our breakdown of following a faucet cartridge replacement video and actually fixing the drip yourself shows how to translate a demo into a confident repair. The single most important step: identify your faucet’s brand and model (stamped on the flange or handle) so you order the matching stem — a Woodford Model 17 stem won’t fit a Prier C-134.
Why does water keep spitting out the top of my outdoor faucet instead of the spout?
If water dribbles or sprays from the little cap on top of the faucet — not the spout — your vacuum breaker (anti-siphon device) has failed, not the shut-off valve. Every frost-free hose bib sold in the U.S. today includes a vacuum breaker to meet backflow-prevention code (it stops contaminated hose water from being siphoned back into your drinking supply). When its internal rubber check seal cracks, water escapes out the top.
The fix is a two-minute part swap: unscrew the vacuum breaker cap on top, pull out the old cartridge/poppet, and drop in a matching replacement kit. It doesn’t require shutting off the whole house — just close the faucet handle first. This is genuinely one of the easiest outdoor-faucet repairs there is, and mixing it up with a “won’t shut off” spout leak sends a lot of people down the wrong repair path.
Should I repair the frost-free faucet or just replace the whole thing?
Repair it if the body is sound and only the washer, seat, or stem failed — which covers the vast majority of cases and costs under $30. Replace the entire faucet only if the sillcock body itself is cracked (from a hard freeze), the pipe threads inside the wall are stripped, or you can no longer source a matching stem for an old, discontinued model. Here’s how the math shakes out:
| Situation | Best move | Typical cost |
|---|---|---|
| Worn washer, sound body | DIY washer swap | $2–$5 |
| Pitted seat or worn stem | DIY stem cartridge replacement | $15–$30 |
| Split body from freeze damage | Replace whole frost-free sillcock | $25–$60 part + solder/press fitting |
| Old / discontinued, no parts available | Replace whole faucet | $25–$60 + labor |
| Leak inside wall / soldered connection | Call a licensed plumber | $150–$350 |
One caution on freeze damage: if you left a hose attached over winter, water can get trapped in the frost-free faucet, freeze, and split the copper tube inside the wall — and it may not leak until spring when you turn it on and water pours into the wall cavity. If your faucet won’t turn off and you see water staining the interior wall or ceiling below, stop, shut the main, and get a plumber, because that’s a burst-tube situation, not a washer.
How do I stop this from happening again?
Detach the hose every fall and shut off the interior supply valve before hard freezes — those two habits prevent both freeze splits and premature washer wear. A few more practical points:
- Install the sillcock at the correct downward pitch. Frost-free faucets must slope slightly down toward the outside so residual water drains out. Installed dead-level, water pools and freezes even on a “frost-free” model.
- Never leave a hose connected in winter. An attached hose traps water in the valve barrel — the single most common cause of a “burst frost-free faucet.”
- Replace washers proactively. If yours is 8+ years old and getting stiff to close, swap the washer before it fails mid-summer.
- Know your model. Note the brand and stem length now, so ordering a repair kit later takes minutes. Understanding the parts layout — supply, valve, seat, spout, hose threads — is exactly what our garden hose faucet diagram guide is for; it’s a genuinely useful reference before you buy or repair any outdoor bib.
What tools and parts do I actually need for this repair?
You need very little — most of this is already in a basic homeowner toolkit:
- Adjustable wrench (or a socket set) — for the packing nut
- Screwdriver — for the handle and washer screw
- Replacement stem washer or full stem repair kit matched to your brand
- Silicone plumber’s grease
- Optional: seat wrench and seat-dressing tool for a damaged seat
- Rag and small bucket for drips
Total spend for the common washer fix is under $10 including the grease, versus $150+ for a service call. Buy a manufacturer-matched repair kit rather than a generic one — the seal geometry on frost-free stems is model-specific, and a “close enough” washer is why some repairs leak again within a week.
FAQ
Can I use my outdoor faucet at all while it won’t turn off?
Not safely — a faucet that won’t shut off wastes water continuously and, in freezing weather, can lead to ice buildup and a split pipe. Shut off the interior supply valve feeding that faucet until you repair it. If there’s no dedicated valve, shutting the main whenever the faucet isn’t in use is a temporary stopgap, but fix it promptly.
Why does my frost-free faucet keep running for a few seconds after I shut it off?
That’s normal. Because the shut-off point is 6–12 inches back inside your wall, the water sitting in the long barrel between the seat and the spout drains out after you close the handle. A few seconds of trailing flow that then stops completely is the faucet working correctly. Flow that never stops is a failed washer or seat.
Do I need to shut off my whole house water to fix this?
Only if there’s no dedicated shut-off valve on the pipe feeding the faucet. Most frost-free sillcocks are fed by a branch line with its own valve indoors — close that and you can leave the rest of the house in service. For the vacuum-breaker repair on top of the faucet, you often don’t need to shut off any supply at all; just close the handle.
How long does a frost-free faucet stem washer last?
Typically 8 to 15 years, depending on water hardness and how often the faucet is used. Hard water shortens that lifespan because mineral scale abrades the washer and pits the seat. If you’re in a hard-water area, expect to replace washers more often and consider a full stem swap when you do, since the seat is likely worn too.
Is a leaking frost-free faucet an emergency?
A spout that won’t shut off isn’t an emergency in warm weather — it’s wasted water you should fix soon. It becomes urgent before a hard freeze (trapped water can burst the barrel) or if you see water inside the wall, which signals a cracked internal tube and calls for a plumber right away.
Can I replace a frost-free sillcock with a regular hose bib?
You can, but you shouldn’t in any climate that freezes. A standard hose bib shuts off right at the wall face, leaving water in the exposed pipe where it freezes and bursts. If your existing faucet is frost-free, replace it with another frost-free model of the same barrel length so it still shuts off inside the heated wall cavity.
About the author: This guide was written by the aleashafaucet fixtures team — plumbing-fixture specialists who spend their days sourcing, bench-testing, and troubleshooting faucets, sillcocks, and valves. We’ve torn down and rebuilt frost-free hose bibs from every major U.S. manufacturer to document exactly how their stems, seats, and washers fail.
Why trust aleashafaucet: aleashafaucet (www.aleashafaucet.com) is a dedicated faucet and bathroom-fixtures brand. Our repair guidance follows the same backflow-prevention and material standards that govern outdoor faucets in the U.S. — including ASSE 1019 for frost-free wall hydrants and the vacuum-breaker requirements built into the plumbing code — and every fixture we sell is backed by a manufacturer warranty. We test seal materials and finishes against real-world hard-water and freeze conditions before we recommend a part.