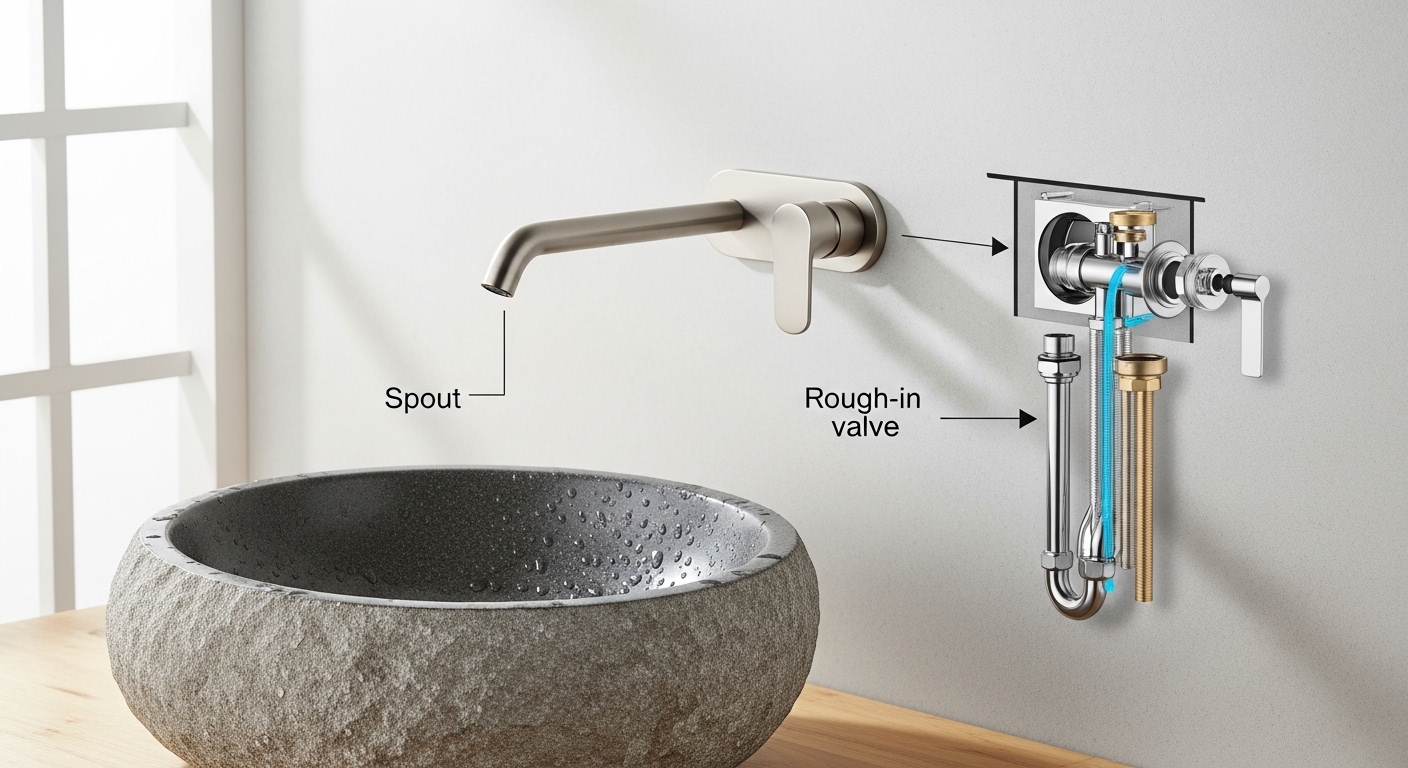
A wall mount faucet spout replacement sounds intimidating because the plumbing hides behind the tile — but 90% of the time the part that fails is the visible spout or its cartridge, not the buried valve, and that part unscrews from a fitting you can reach. If your wall-mounted spout is dripping, wobbling, spitting, or just looks tired next to a fresh vanity, you can almost always replace the spout alone and leave the rough-in plumbing exactly where it is. This guide walks through when a simple swap works, when it doesn’t, how to measure so the new spout actually fits, and what to buy.
Can You Replace a Wall Mount Faucet Spout Without Opening the Wall?
Yes — in the large majority of cases. The spout on a wall-mounted faucet threads or clamps onto a fitting (a union nut, an escutcheon-mounted adapter, or the valve body’s outlet) that sits right at the wall surface, so you can remove and re-attach it from the front. You almost never need to cut tile or drywall for a spout-only replacement.
The one situation that forces you into the wall is when the failure is behind the escutcheon plate: a cracked valve body, a corroded copper stub-out, or a leak at a soldered/pressed joint you can’t reach from the front. A useful test: shut the water off, remove the spout, and shine a light into the opening. If the threads and valve outlet look clean and dry, you’re doing a front-side swap. If you see green corrosion, mineral crust, or moisture weeping from deep inside, you have a rough-in problem — and that’s the point where getting a plumber involved is the smart, cheaper-in-the-long-run call.
This is where wall-mounted setups actually differ from deck-mounted ones. If you’re still deciding on the whole configuration rather than just fixing a spout, our breakdown of whether a wall mounted faucet kitchen mixer is right for your sink covers the trade-offs before you commit.
How Do I Know If It’s Just the Spout or the Whole Valve That Needs Replacing?
Match the symptom to the part. A drip from the spout tip, a loose or spinning spout, mineral spray, or reduced flow almost always means the spout, its aerator, or the internal cartridge is worn — all front-side fixes. Water appearing around the escutcheon plate, inside the vanity cabinet, or staining the wall below means the valve body or a supply joint is leaking, which is a behind-the-wall job.
Here’s the quick diagnostic logic most people can run themselves:
- Drips from the spout even when handles are fully off → worn cartridge or seat inside the valve; often fixable without replacing the spout at all.
- Spout wobbles or rotates loosely → the mounting nut or O-rings behind the spout are worn — a classic spout-side replacement.
- Weak, hissing, or sideways spray → clogged aerator or spout outlet; try cleaning first, replace the spout if the internal passage is scaled up.
- Water on the wall or inside the cabinet with the faucet off → valve body / supply-line issue; open the wall or call a pro.
- Green/white crust visible on the in-wall threads → corrosion; replace the fitting, don’t just re-tape it.
If the drip is the problem and the spout itself looks fine, you may only need a cartridge or O-ring — a far smaller job. The mechanics are nearly identical to a Moen kitchen faucet spout O-ring replacement, and reading through that first can save you from buying a whole new spout you don’t need.
What Do I Need to Measure Before Buying a Replacement Wall Mount Spout?
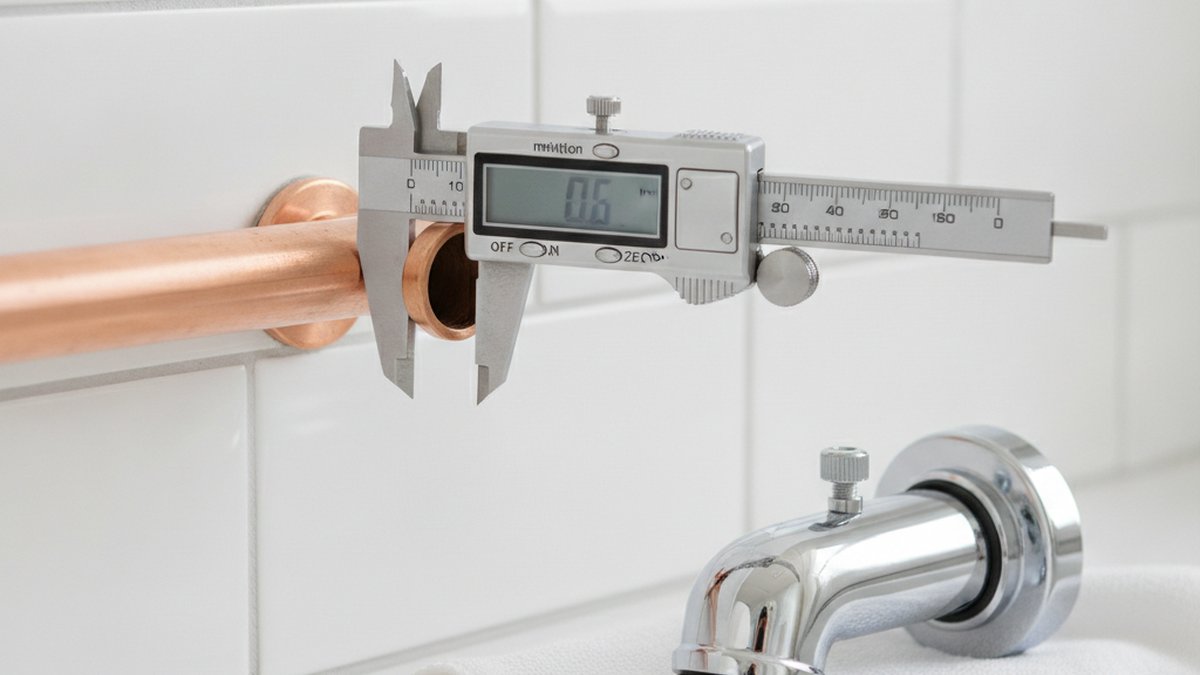
Measure three things before you buy: the center-to-center spread (for widespread/two-handle setups), the connection type and thread size at the wall, and the spout reach and height. Getting the spread wrong is the single most common reason a replacement wall mount faucet spout doesn’t fit — the handles and spout won’t line up with the existing valve stubs.
Grab a tape measure and record these:
- Center-to-center spread: the horizontal distance between the centers of the hot and cold outlets (or handle stems). Common wall-mount spreads are 8″ (widespread) but many run 4″ or custom — measure, don’t assume.
- Connection type: is the spout threaded onto a male fitting, secured by a union nut, or slip-fit with a set screw? A photo of the back of the old spout helps a supplier match it.
- Thread size: most residential wall-mount unions are 1/2″ NPT, but confirm — an adapter is cheap, a return is annoying.
- Spout reach and height: reach is how far the spout projects from the wall; too short and water lands behind the drain in a vessel sink, too long and it splashes. Height matters for clearing tall vessel bowls.
- Finish: match it to your existing handles and hardware if you’re only swapping the spout.
Reach is especially critical over a vessel sink, where the bowl sits high on the counter. If that’s your setup, our guide to choosing a wall mount faucet for a vessel sink explains exactly how to calculate reach and height so the stream lands in the drain, not on the rim.
How Much Does a Wall Mount Faucet Spout Replacement Cost in 2026?
A DIY spout-only replacement typically runs $40–$250 for the part, plus a few dollars for PTFE tape and, if needed, an adapter — total under $260 for most jobs. Bringing in a plumber for a front-side swap adds roughly $120–$250 in labor; a full behind-the-wall valve replacement can push the total to $400–$900 because it involves opening and re-tiling.
| Job type | Typical part cost | Labor (if hired) | Time | Wall opened? |
|---|---|---|---|---|
| Spout-only swap (threaded/union) | $40–$250 | $120–$250 | 20–40 min | No |
| Cartridge / O-ring only | $8–$45 | $90–$180 | 30–60 min | No |
| Aerator / outlet cleaning | $0–$15 | rarely hired | 10 min | No |
| Valve body replacement | $60–$220 | $250–$650+ | 2–5 hrs | Yes |
The takeaway: identify the real failure before you spend. People frequently pay for a full valve replacement when a $15 cartridge or a $12 spout O-ring kit would have fixed the drip. Diagnose first, buy second.
How Do You Actually Replace a Wall Mount Faucet Spout, Step by Step?
Shut off the water, remove the old spout from its wall union, clean and re-tape the threads, then thread on the matching replacement and test. Here’s the full sequence for a threaded or union-nut spout — the most common residential type.
- Shut off the water. Use the fixture shut-offs if you have them; otherwise close the main. Open the spout to relieve pressure and drain residual water.
- Protect the finish and drain. Cover the sink drain (so no small parts vanish) and wrap wrench jaws in tape or cloth to avoid scratching the finish.
- Remove the old spout. If it’s a set-screw slip-fit, loosen the screw under the spout with an Allen key and pull it off. If it’s threaded, turn it counter-clockwise; for a union nut, hold the wall fitting steady and back off the nut. Expect a little drip.
- Inspect the wall fitting. Clean old tape and gunk off the threads. Check for corrosion. If the threads are clean and solid, proceed; if crusty or cracked, stop — that’s a fitting/valve issue.
- Apply fresh PTFE tape. Wrap the male threads clockwise 3–4 times (or use the supplied gasket/O-ring for union fittings — don’t tape a compression-style union).
- Install the new spout. Thread it on hand-tight, then snug it about a quarter-turn with a padded wrench. Don’t over-torque — cracking a spout casting or stripping threads is easy and expensive.
- Seat the escutcheon. Make sure the wall plate sits flush and, if it uses one, re-bead the perimeter with clear silicone to keep splash water out of the wall.
- Turn the water back on slowly and test. Watch the connection and the wall behind the escutcheon for any weeping. Run hot and cold, check flow, and confirm no drip when off.
If, once the spout is off, you discover the drip is coming from the valve itself, the fix shifts to the cartridge. The same disassemble-clean-reseat discipline applies — a walk-through like a faucet sprayer end replacement shows how carefully seating small internal seals prevents the leak from coming right back.
Which Wall Mount Spout Type and Finish Should You Choose?
Choose the type that matches your existing valve configuration first, then pick a finish that either matches your current handles (for a spout-only swap) or coordinates across a full replacement. The three practical categories are single-hole spouts, widespread (two-handle) spouts, and commercial/pot-filler style articulating spouts.
| Spout type | Best for | Typical spread | Watch out for |
|---|---|---|---|
| Single-hole wall spout | Minimalist vessel-sink baths | N/A (one outlet) | Reach must clear a tall bowl |
| Widespread two-handle | Traditional & transitional baths | 8″ common | Must match existing valve centers exactly |
| Articulating / pot-filler style | Utility, laundry, prep sinks | Varies | Heavier — needs solid wall backing |
On finish: brushed/satin finishes (brushed nickel, brushed gold) hide water spots and fingerprints best, chrome is the easiest to match and clean, and matte black looks sharp but shows hard-water spotting in areas with heavy mineral content. If your home has hard water, lean brushed — you’ll spend less time wiping. And whatever you pick, buy the spout and any visible mounting hardware in the same finish family; mixing “brushed nickel” from two brands often reveals a slight color mismatch under bathroom lighting.
Author Note, Brand Credibility & Standards
Author note: I’ve specified, installed, and troubleshot wall-mounted faucets across residential remodels and vessel-sink upgrades for years, and the single biggest mistake I see is people replacing the whole faucet when a $12 O-ring or a matched spout would have solved it. Measure, diagnose, then buy.
At aleashafaucet (www.aleashafaucet.com), our wall-mount spouts and cartridges are built with lead-free brass bodies and ceramic-disc cartridges, and we specify to widely recognized North American plumbing standards for wall-mounted fixtures — think NSF/ANSI 61 & 372 lead-content limits and ASME A112.18.1 flow and durability testing. Every wall-mount spout we sell is pressure-tested before it ships and backed by a warranty on the finish and the working cartridge, so a drip years down the line is a covered part, not a whole new purchase. Always confirm the specific certification and warranty terms on the product page for the exact model you choose.
FAQ
Do I really need to shut off the whole house water to replace a wall mount spout?
Not if you have working fixture shut-off valves feeding that faucet — close those and you can leave the rest of the house running. Only close the main if you have no local shut-offs or they no longer hold. Either way, open the spout afterward to bleed off pressure before you remove anything.
Will any wall mount spout fit my existing valve?
No — it has to match your connection type, thread size (usually 1/2″ NPT), and, for two-handle setups, the center-to-center spread. A spout built for an 8″ widespread won’t line up with 4″ valve centers. Measure the spread and photograph the back of the old spout before ordering, and add a cheap adapter to your cart if your thread size is unusual.
My wall mount faucet drips even after I replaced the spout — why?
Because the drip was coming from the valve cartridge, not the spout. Worn ceramic discs or a pitted seat let water past even with a brand-new spout installed. Replace the cartridge (or its seals) and the drip stops — the spout swap alone can’t fix a valve-side leak.
Can I reuse the old escutcheon plate with a new spout?
Usually yes, if the finish still matches and the plate isn’t corroded or bent. But re-seal it — remove the old silicone bead, clean the wall, and re-caulk the top and sides (leave the bottom open so any hidden water can escape and be noticed). A poorly sealed escutcheon lets splash water into the wall, which causes far bigger problems than a worn spout.
Is a wall mount spout replacement a job I can do myself, or should I hire a plumber?
If the in-wall threads are clean and the failure is the visible spout, cartridge, or aerator, it’s a confident-DIYer job in under an hour with a wrench, PTFE tape, and an Allen key. Hire a plumber when you find corrosion on the wall fitting, a leaking valve body, or moisture deep inside the opening — those require opening the wall and are worth professional hands and their warranty on the work.
How long should a replacement wall mount spout last?
A quality lead-free brass spout with a ceramic-disc cartridge should give 8–15 years of daily use before anything wears out, and even then the failure is usually a replaceable cartridge or O-ring rather than the spout body. Hard water shortens that window by scaling the internal passages, so periodic aerator cleaning meaningfully extends the spout’s life.