A faucet cartridge replacement glacier bay job is one of the most satisfying and beginner-friendly plumbing repairs you can do, because a worn cartridge is the single most common reason a Glacier Bay faucet drips, gets stiff, mixes hot and cold poorly, or sputters. Glacier Bay is Home Depot’s house brand, and while the fixtures are affordable and well-made, their cartridges are the wear part — the little valve inside the faucet body that actually starts and stops the water every single time you turn the handle. Replace it, and a “dying” faucet almost always behaves like new.
Below, I’ll walk you through exactly how to identify your cartridge, remove it, install the new one, and avoid the two or three mistakes that trip up first-timers. I’ve done this on kitchen, bathroom, and tub Glacier Bay valves, and the process is nearly identical across the line.
How do I know if my Glacier Bay faucet actually needs a new cartridge?
If your Glacier Bay faucet drips after you shut it off, the handle feels gritty or hard to turn, the water temperature won’t hold steady, or the flow has dropped to a trickle, the cartridge is the most likely culprit — not the whole faucet. The cartridge is the only moving valve inside, so it takes all the wear.
Before you order a part, run through these symptoms to confirm the cartridge is the problem and not something simpler:
- Constant drip from the spout even when the handle is fully off — worn seals or a cracked ceramic disc inside the cartridge.
- Stiff, grinding, or notchy handle — mineral buildup has seized the cartridge; hard-water homes see this in 3–5 years.
- Hot and cold won’t mix right or the temperature swings — the cartridge’s mixing chamber is worn.
- Weak flow from one handle only — that side’s cartridge is clogged or failing (though also check the aerator first).
- Water leaking from around the base of the handle — the cartridge O-rings have gone brittle.
Quick gut check: if the flow is weak but the faucet doesn’t drip, unscrew and clean the aerator before you touch the cartridge — a clogged aerator mimics a bad cartridge and costs nothing to fix. Our guide on how to clean a clogged faucet aerator covers that five-minute test. If cleaning the aerator doesn’t restore flow, the cartridge is next.
Which Glacier Bay cartridge do I actually need to buy?
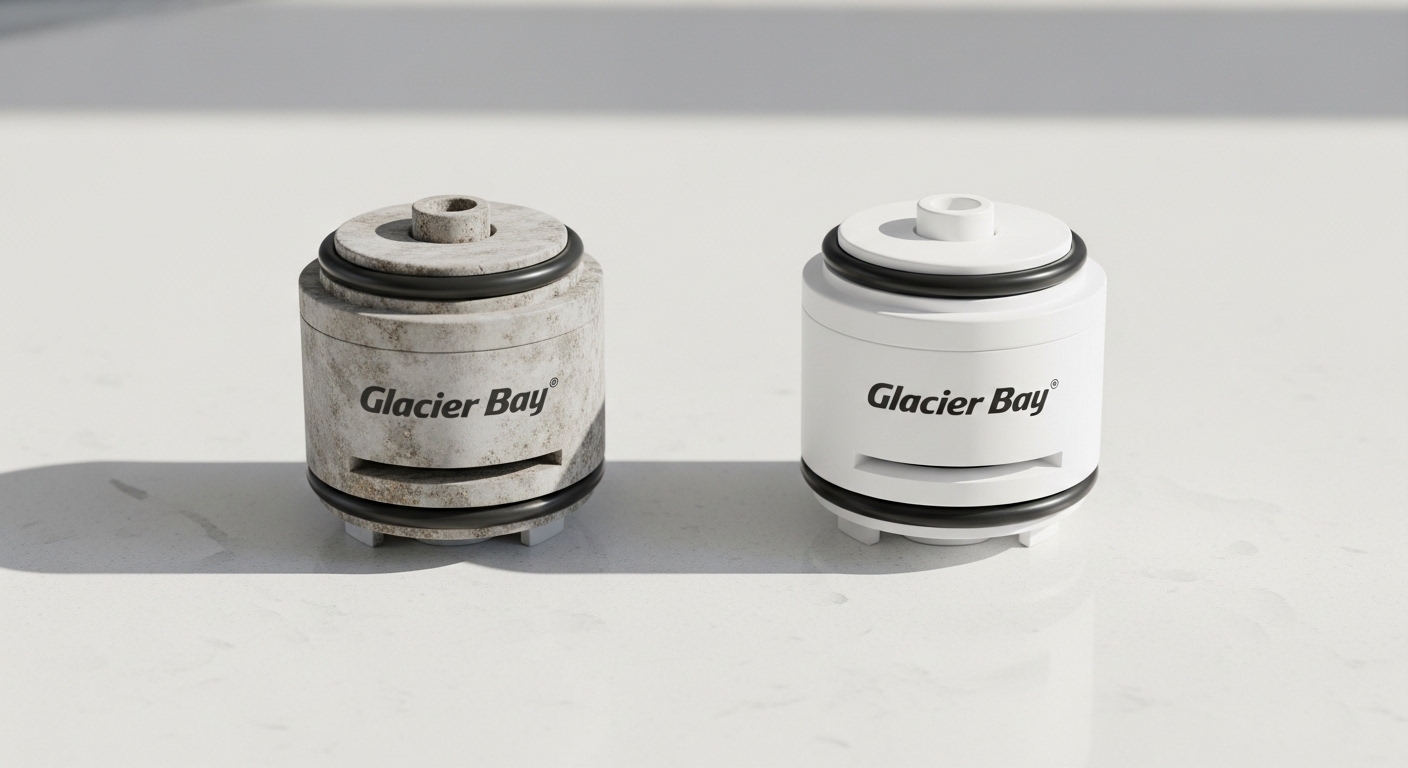
Buy the cartridge that matches your specific faucet model — Glacier Bay uses several different cartridge styles, and they are not interchangeable. The fastest way to get the right one is to pull the old cartridge first and match it, or look up your faucet’s model number (usually printed on the original box, the paperwork, or a sticker under the sink).
Here’s the reality that frustrates a lot of DIYers: “Glacier Bay” isn’t one cartridge. Depending on whether you have a single-handle kitchen faucet, a two-handle bathroom faucet, or a tub/shower valve, you’ll need a different part. Bring the old one to the store, or better, pull it and photograph it beside a ruler.
| Faucet Type | Common Cartridge Style | How It’s Held In | Typical Part Cost |
|---|---|---|---|
| Single-handle bathroom faucet | Ceramic-disc pull-out cartridge | Retaining nut or clip | $8–$15 |
| Two-handle bathroom faucet | Quarter-turn ceramic stem (hot & cold, sold as a pair) | Threaded, screws in | $10–$20/pair |
| Single-handle kitchen faucet | Ball or ceramic cartridge | Dome cap or clip | $12–$25 |
| Tub & shower valve | Pressure-balance cartridge | Brass retaining clip | $15–$30 |
One pro tip: for a two-handle faucet, replace both the hot and cold cartridges at the same time even if only one is leaking. They’ve aged together, and the second one usually fails within a year. A matched pair costs a few dollars more and saves you a repeat teardown. If you’re dealing specifically with a tub valve, the mechanics overlap heavily with a bathtub faucet stem replacement, which uses the same shut-off-and-swap logic.
How do I replace a Glacier Bay faucet cartridge step by step?
Shut off the water, remove the handle, pull the retaining clip or nut, extract the old cartridge, insert the new one in the exact same orientation, and reassemble. Here’s the full sequence — it’s the same skeleton for almost every Glacier Bay faucet, with small differences noted.
- Turn off the water supply. Reach under the sink and close both shutoff valves (turn clockwise until snug). No under-sink valves? Shut off the main. Then open the faucet to release pressure and confirm the water is actually off.
- Plug the drain. Drop in the stopper or lay a rag over it so no small screws or clips disappear down the pipe. This one step saves a lot of grief.
- Remove the handle. Most Glacier Bay handles have a small cap on top or a set screw on the side (often needing a 2.5mm Allen/hex key). Pry off the decorative cap with a flat screwdriver, back out the screw, and lift the handle straight up.
- Remove the retaining piece. You’ll see either a threaded plastic/brass retaining nut (unscrew with pliers or a wrench) or a U-shaped metal clip (pull it straight up and out with needle-nose pliers). Keep track of any dome cap or trim ring.
- Pull the old cartridge. Grip the cartridge stem with pliers and pull straight up. If it’s stuck from mineral scale, rock it gently side to side — never crank it hard. A cartridge puller tool ($10) makes stubborn ones easy, but most come out by hand.
- Note the orientation. Before it’s fully out, look at how it’s keyed — there’s usually a flat, notch, or tab that lines up with the faucet body. Snap a phone photo. Installing it 180° off is the #1 rookie mistake and it reverses your hot and cold.
- Clean the cavity. Wipe out the valve body with a rag and a little white vinegar to dissolve mineral crust. A clean seat helps the new cartridge seal.
- Insert the new cartridge. Line up the key/notch exactly as the old one sat, and press it firmly down until it seats. A dab of silicone plumber’s grease on the O-rings helps it slide in and last longer.
- Reassemble in reverse. Reinstall the clip or retaining nut, then the handle and screw, then the cap.
- Turn the water back on slowly and test. Run hot and cold, check that the drip is gone, and look under the sink for leaks.
The logic here is identical to fixing a leak on other brands — if you’ve ever seen our walkthrough on how to fix a leaking Moen kitchen faucet, you’ll recognize the shut-off, teardown, and cartridge-swap rhythm. The parts differ; the method doesn’t.
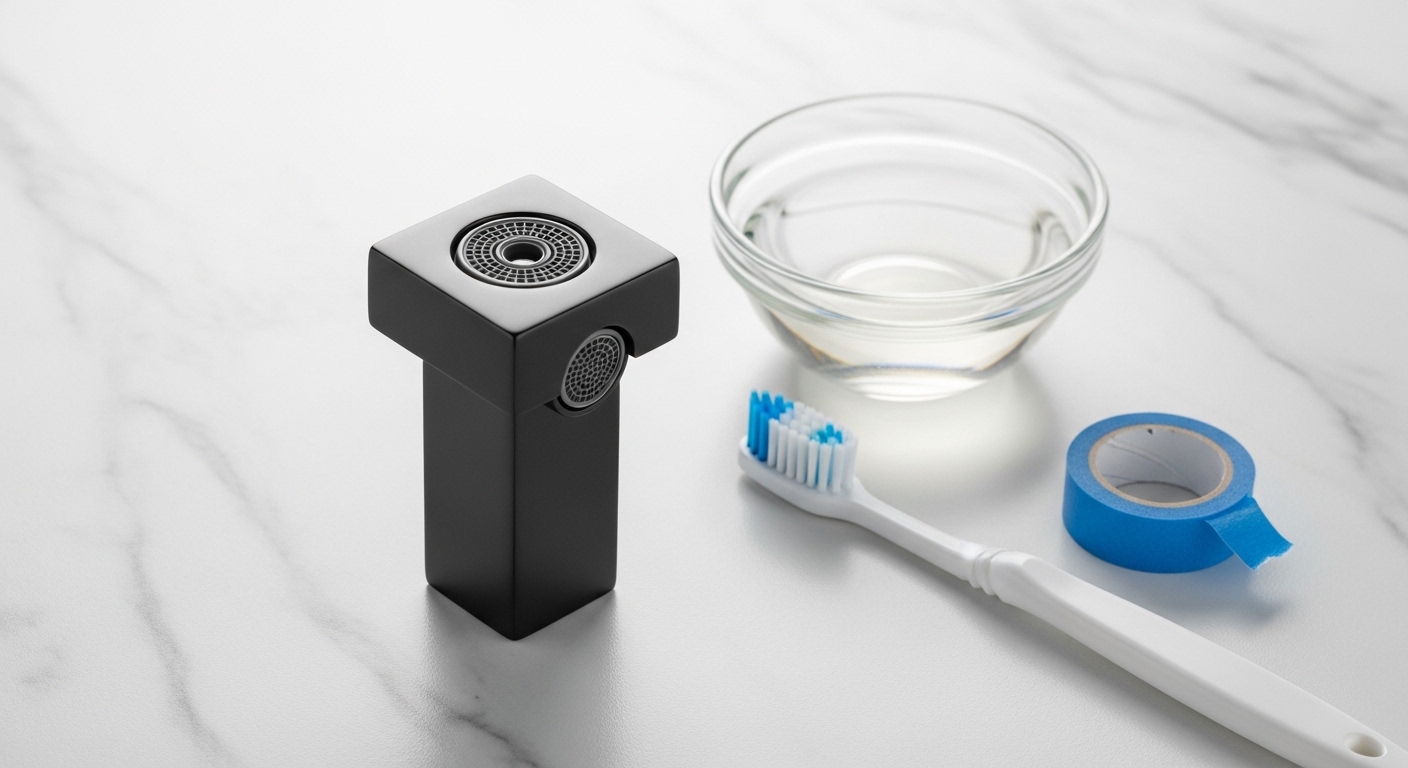
What tools do I need for this repair?
You need only basic hand tools — nothing specialized. Here’s the complete list:
- Phillips and flat-head screwdrivers
- An adjustable wrench or channel-lock pliers
- Needle-nose pliers (for the retaining clip)
- A 2.5mm hex/Allen key for set-screw handles
- White vinegar and a rag for descaling
- Silicone plumber’s grease (optional but recommended)
- A cartridge puller (only if yours is badly seized)
My Glacier Bay cartridge is stuck — how do I get it out without breaking the faucet?
If the cartridge won’t budge, it’s almost always mineral scale locking it into the valve body — soak it and pull with a dedicated puller rather than forcing it. Cranking on a seized cartridge can crack the plastic body or snap the stem off, turning a $12 fix into a full faucet replacement.
Here’s the safe removal sequence for a stuck cartridge:
- Pour warm white vinegar into and around the cartridge and let it sit 15–30 minutes to dissolve the calcium/lime crust.
- Rock the stem gently back and forth — small movements, not brute force — to break the mineral bond.
- Use an inexpensive plastic cartridge-puller tool that threads onto the stem and pulls straight, keeping the force axial so nothing snaps.
- If the stem breaks off (it happens), the puller’s outer sleeve grabs the shell to extract it; otherwise, a matched brand-specific puller is worth the $10.
Homes with hard water get seized cartridges far more often. If you keep fighting scale on every fixture — clogged aerators, crusty cartridges, spotty finishes — a whole-house or point-of-use filter pays for itself. Our tap water filter buyer’s guide breaks down the options that actually cut the mineral load reaching your faucets.
How much does a Glacier Bay cartridge replacement cost — DIY vs. a plumber?
Doing it yourself costs $8–$30 in parts and about 30 minutes; hiring a plumber runs $100–$250 once you add the trip charge and labor. For a repair this straightforward, DIY is the obvious call unless the faucet is in an awkward wall-mounted or tub setup.
| Option | Parts Cost | Labor | Total | Time |
|---|---|---|---|---|
| DIY (single cartridge) | $8–$25 | $0 | $8–$25 | 20–40 min |
| DIY (two-handle pair) | $10–$20 | $0 | $10–$20 | 30–50 min |
| Plumber | $8–$30 | $90–$220 | $100–$250 | 1 hr visit |
The math strongly favors DIY here. The only times I’d call a pro are a corroded valve buried in a wall, a tub/shower body that needs re-soldering, or if you’ve already tried and the leak persists (which sometimes points to a cracked valve body rather than the cartridge). If the drip continues even after a fresh cartridge, the same troubleshooting logic in our guide to a dripping tub faucet will help you find the deeper cause.
Are Glacier Bay cartridges universal, and can I upgrade to a better one?
No, Glacier Bay cartridges are not universal — you must match the style to your faucet — but many Glacier Bay valves accept improved aftermarket ceramic-disc cartridges that last longer than the original. Ceramic-disc versions resist hard-water wear far better than older rubber-seal or ball designs.
When you’re buying a replacement, you have three routes:
- Exact OEM Glacier Bay part — guaranteed fit, sold at Home Depot by model number. Safest choice.
- Compatible aftermarket cartridge — often cheaper and sometimes higher quality; check the cross-reference chart for your model.
- Upgraded ceramic-disc cartridge — a worthwhile step up if your original was a worn rubber-seal type and you have hard water.
If your faucet is more than 10–12 years old, dripping constantly, and the finish is also worn or dated, do the math on a full replacement instead. A new mid-range faucet can cost only a bit more than repeated repairs, and you get a fresh finish and modern ceramic internals. If you go that route, browse the best bathroom faucets on sale before you buy so you don’t overpay.
How long will a new Glacier Bay cartridge last?
A quality ceramic-disc cartridge typically lasts 5–10 years, and longer in soft-water homes. What kills them early is almost always hard-water scale and grit, not age alone. You can stretch that lifespan considerably with a few habits:
- Clean your aerators every few months so debris doesn’t back up into the valve.
- Don’t crank the handle shut with force — ceramic discs seal with light pressure.
- Address hard water at the source with a filter or softener.
- Use silicone plumber’s grease on the O-rings at install to prevent early drying and cracking.
FAQ
Where is the model number on my Glacier Bay faucet?
Check the original box or installation paperwork first, then look for a small sticker or stamp under the sink on the faucet body or supply shank. If you can’t find it, remove the cartridge and match it physically at Home Depot or by photographing it next to a ruler — the cartridge shape and keying identify the part more reliably than a faded number.
Do I need to turn off the main water supply, or just the valves under the sink?
Just the two shutoff valves under the sink are usually enough — turn them clockwise until snug and open the faucet to confirm the flow stops. Only shut off the whole-house main if your fixture has no working under-sink valves or you have a tub/shower valve with no local shutoff.
Why is my Glacier Bay faucet still dripping after I replaced the cartridge?
The most common reasons are the new cartridge seated incorrectly (not pushed fully down or rotated off its keyway), a piece of debris caught on the seal, or the wrong cartridge model. Pull it, flush the valve body with water, check the orientation against your photo, and reseat it. If it still drips, the valve body itself may be cracked or pitted and need replacing.
Can I replace just one cartridge on a two-handle faucet?
You can, but you shouldn’t. The hot and cold cartridges wear at the same rate, so if one has failed, the other is usually close behind. Replacing both at once costs only a few extra dollars and spares you a second teardown within the year.
Is a stuck cartridge a sign I need a whole new faucet?
Not usually. A stuck cartridge is almost always mineral scale, not a failed faucet. Soak the valve with warm white vinegar, rock the stem gently, and use a cartridge-puller tool. Only consider a full replacement if the valve body cracks during removal or the faucet is old and worn in other ways too.
Do I need plumber’s grease, and what kind?
It’s optional but recommended. Use a food-safe silicone-based plumber’s grease (never petroleum-based, which degrades rubber O-rings) on the cartridge seals. It helps the cartridge slide in without pinching the O-rings and keeps them supple, extending the cartridge’s life.
About the author: This guide was written by the aleashafaucet product and repair team, who test faucet cartridges, valves, and finishes hands-on across kitchen and bathroom fixtures. We’ve documented cartridge swaps on single-handle, two-handle, and tub/shower Glacier Bay valves to keep this walkthrough accurate to what you’ll actually see under your sink.
About aleashafaucet: aleashafaucet specializes in faucets, shower systems, and bathroom fixtures, with a focus on durable ceramic-disc valve technology. Our replacement components are built to standards aligned with common faucet durability testing (cartridge cycle-life and finish-wear testing), and our own fixtures carry a manufacturer’s warranty on the cartridge and finish. When repairing a third-party faucet like Glacier Bay, always confirm the part against your model number and your faucet’s original warranty terms before installing.