If you’ve landed here, you already know how to fix a Moen kitchen faucet from leaking is rarely about the whole faucet being “broken” — it’s almost always one small worn part inside an otherwise solid fixture. Moen builds their kitchen faucets around a few well-documented cartridges and seal kits, which means once you identify which part has failed, the repair is genuinely a one-cup-of-coffee job. This guide walks through every leak location — spout drip, handle weep, base puddle, sprayer dribble, supply-line seep — tells you exactly which Moen part to buy, and gives you the step-by-step that real plumbers use.
Where is your Moen faucet actually leaking from?
Before you buy any parts, find the exact leak point — the fix is completely different for each. Wipe the entire faucet bone-dry with a paper towel, run the water for 30 seconds, shut it off, and watch for 5 minutes. The first place water reappears is your culprit.
- Drip from the spout tip (water off): 90% of the time this is a worn cartridge. Most single-handle Moens use the Moen 1255 Duralast (post-2009) or the older Moen 1225.
- Weep around the handle base when running: usually the handle-side cartridge O-rings or a loose retainer nut.
- Puddle under the spout swivel / deck: the spout O-rings (Moen kit 96778 or 116651) have hardened.
- Drip from the pull-down sprayer wand: the sprayer head seals or the quick-connect hose coupling.
- Water under the cabinet near the supply lines: braided supply hose, hot/cold inlet seals, or the weight on the pull-down hose chafing the line.
- Drip from the soap dispenser or air gap hole: not actually the faucet — it’s a separate accessory.
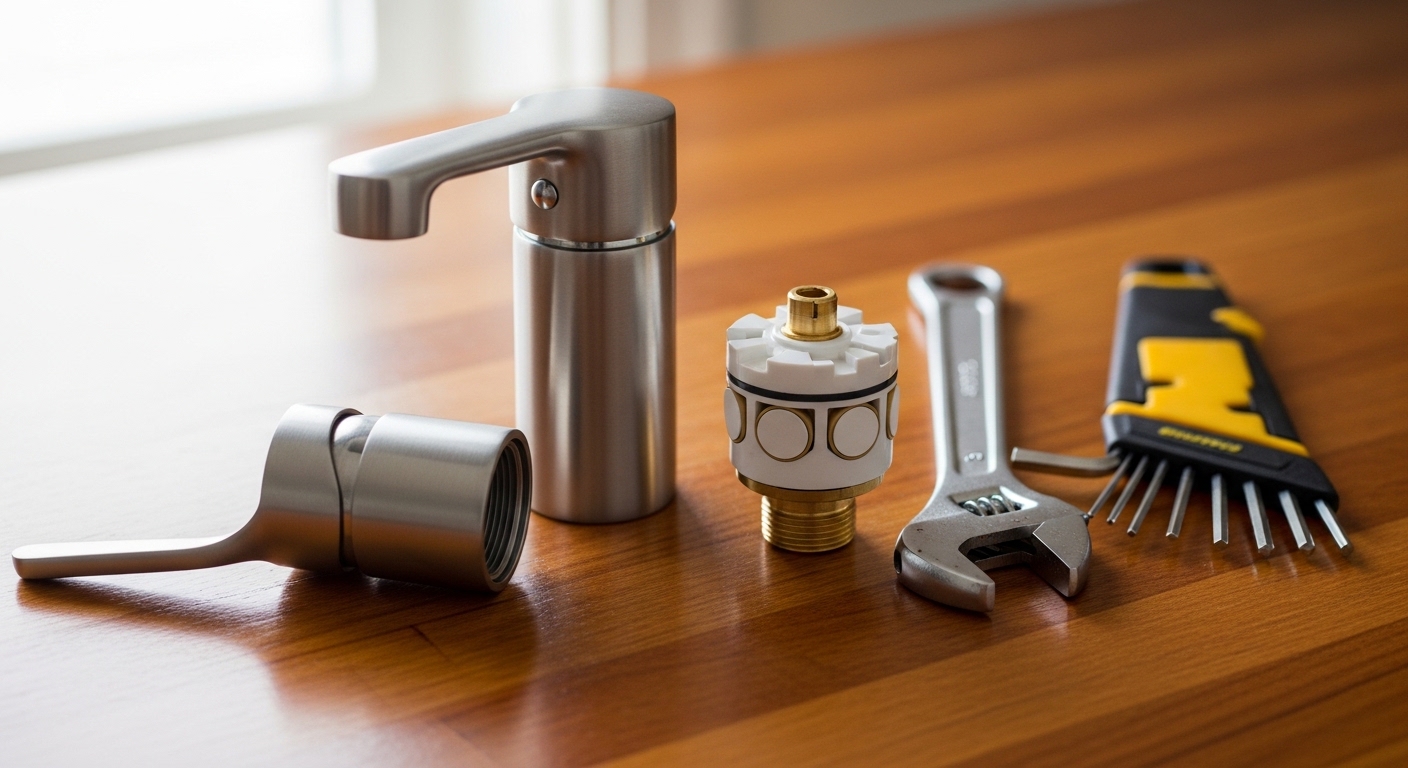
What tools and parts do I need before I start?
Keep it simple — Moen designed these faucets to be serviced with a small kit. You almost never need a basin wrench for the repair itself (only if you’re replacing the whole faucet).
| Tool / Part | Why You Need It | Approx. Cost (2026) |
|---|---|---|
| 2.5 mm Allen / hex wrench | Removes the set screw on most Moen single-handle kitchen faucets | $3 (often included with new cartridge) |
| Phillips #2 screwdriver | For older lever-style handle screws under the red/blue cap | $5 |
| Channel-lock pliers (10″) | Removes the retainer nut / clip; wrap jaws in tape to avoid finish scratches | $15 |
| Moen 1255 cartridge | Standard replacement for single-handle Moens, 2009–present | $28–$45 |
| Moen 1225 cartridge | For pre-2009 single-handle Moens (brass body) | $25–$40 |
| Moen 96778 / 116651 O-ring kit | For base / spout leaks on swivel-spout models | $8–$12 |
| Plumber’s silicone grease | Lubricates new O-rings so they seat without tearing | $5 |
| Bucket + old towel | Catches the cup of trapped water in the faucet body | — |
One real-world tip: if your faucet is more than 10 years old and you’ve never serviced it, buy both the cartridge and the O-ring kit at the same time. You’ll already have the faucet apart, and the seals cost less than a coffee. This is the same approach we recommend in our walkthrough on why a faucet becomes hard to turn — old grease and mineral scale are usually the cause of both issues.
How do I shut off the water and prep the sink area?
Reach under the sink and turn both angle stops (the small oval valves on the hot and cold supply lines) clockwise until they stop. Open the faucet handle to release pressure — if water keeps flowing, your shut-offs are failing and you’ll need to close the main house valve. Don’t skip this; a Moen faucet under 60 psi will soak the entire cabinet in under a minute.
Plug the sink drain with a rag — set screws and tiny clips love to disappear down the drain at the worst possible moment. Lay an old towel across the bottom of the sink to catch any dropped tools and protect the basin finish.
How do I fix the most common leak — a dripping spout — by replacing the cartridge?
A dripping spout when the handle is off means the cartridge can no longer seal against the inlet ports. Replacing it is the single most effective Moen kitchen faucet repair and takes 20–30 minutes. Here is the exact sequence:
- Remove the handle. On single-handle models, look at the back of the handle for a small set screw — use your 2.5 mm Allen wrench to back it out (don’t remove it completely; it’s tiny). The handle lifts straight up.
- Unscrew the dome / handle adapter. Twist counter-clockwise by hand. If it’s stuck, wrap it in a rubber jar grip — never use bare pliers on a finished surface.
- Pull the retainer clip. You’ll see a horseshoe-shaped metal clip straddling the cartridge stem. Pry it straight up with a flat screwdriver or needle-nose pliers.
- Pull the old cartridge straight up. Moen sells a plastic cartridge-puller tool (#104421) that hooks the stem — useful if it’s seized from mineral scale. Twist gently side-to-side while pulling. A short squirt of CLR or white vinegar around the seam helps a corroded one let go.
- Compare old vs. new. The 1255 and 1225 look similar but are not interchangeable — match the body shape exactly.
- Lube and insert the new cartridge. Smear a thin film of silicone grease on the new O-rings. Push it straight down into the body — the flat tab on the stem should align with the “HOT” mark stamped into the body (this controls handle direction).
- Reinstall in reverse. Clip → dome → handle → set screw. Snug only — Moen handles do not need to be cranked tight.
- Turn the water back on slowly and check both handle positions and the spout tip for any weep.
If the new cartridge still drips, you almost certainly have debris from old pipes sitting on the inlet seats. Pull the cartridge back out, shine a flashlight into the faucet body, and pick out the grit with tweezers before reinstalling.
How do I stop a leak at the base of the spout where it swivels?
This one fools a lot of DIYers — water appears only when the faucet is running, then disappears, so people blame the cartridge. It’s actually the spout O-rings: two black rubber rings that seal the swiveling spout to the faucet body. Heat, mineral water, and citrus cleaners harden them within 5–8 years.
To fix it: remove the handle and dome as above, then look for a small set screw on the back of the spout collar (some models have it; others use a threaded retainer ring). Lift the entire spout straight up off the faucet body. You’ll see two O-rings on the central post. Roll them off with your fingernail, clean the post with a microfiber cloth, smear silicone grease on the new O-rings (Moen kit 96778 fits most), roll them on, and slide the spout back down. Done.
This is the same maintenance principle we cover in detail in our piece on why bathroom faucets corrode — the seals fail long before the metal does, and the seals are cheap.
How do I fix a pull-down sprayer that drips after I let go?
If your Moen pull-down or pull-out sprayer keeps dribbling for 10–20 seconds after the water shuts off, that’s normal — there’s water trapped in the hose. But if it drips continuously, the issue is one of three things:
- Stuck pause button: press and release it several times; mineral buildup often jams the diverter.
- Worn sprayer head seals: unscrew the wand from the hose (counter-clockwise, by hand) and inspect the two O-rings inside the coupling. Replace if flat or cracked.
- Quick-connect coupling worn: on Moen “Reflex” and “Power Boost” models, the white plastic quick-connect that joins the hose to the faucet body has an internal seal. Moen sells a replacement hose assembly for around $30 — and it’s a 5-minute swap.
For weighted hoses, also check that the counterweight isn’t pinching the hose against the cabinet wall — that bend will eventually crack the braid and leak under the sink.
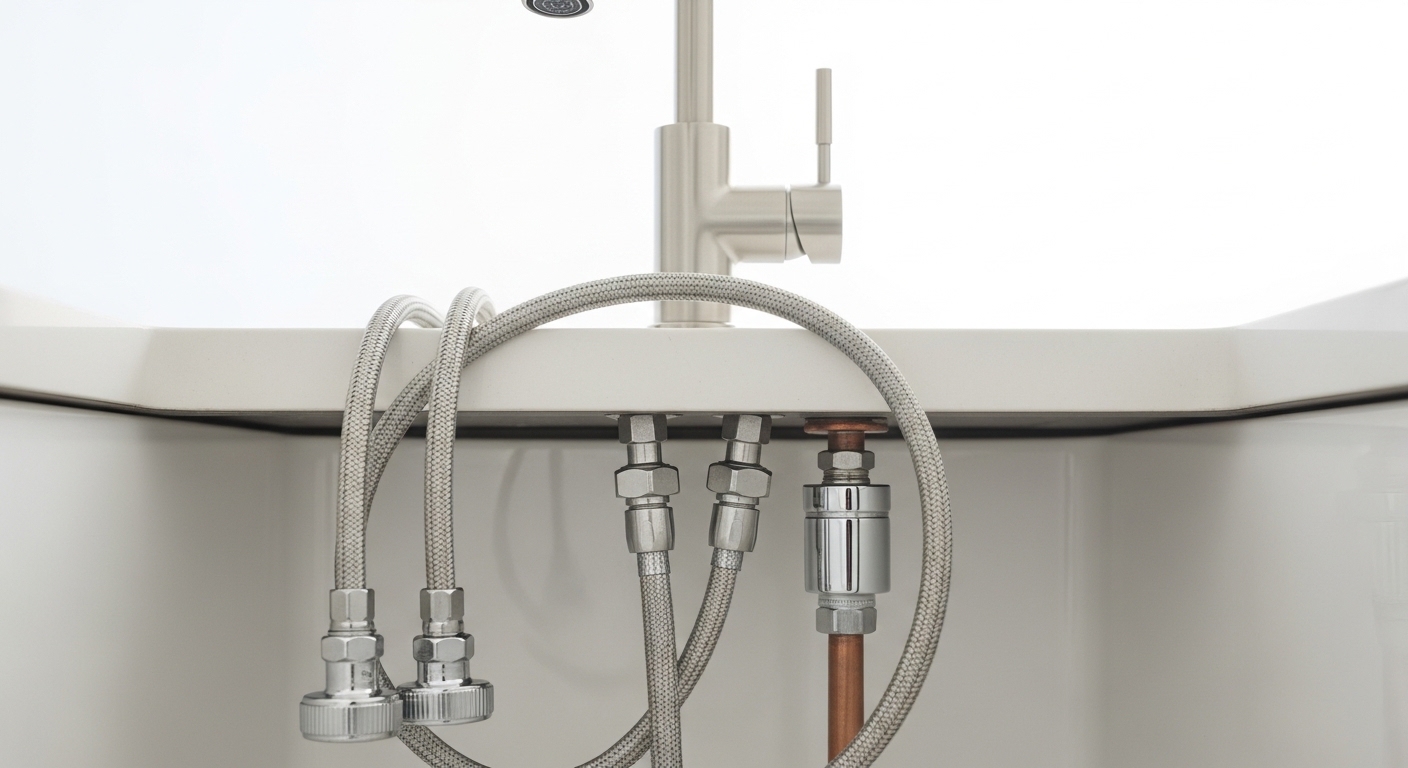
What if the leak is under the sink, not at the faucet itself?
Water on the cabinet floor doesn’t always mean the faucet body is leaking. Run your hand along each connection while the water is on — the moment you feel moisture, you’ve found it. Common under-sink culprits:
- Braided supply lines: the stainless braid hides pinhole leaks. If a line is over 8 years old, replace both hot and cold while you’re down there.
- Hot/cold inlet nuts: the brass nuts that thread onto the faucet shanks. A quarter-turn tighter (by hand, then a snug bump with a wrench) usually stops a weep. Don’t over-torque — you’ll crack the plastic.
- Sprayer hose weight pinch point: see above; the slow drip migrates to the lowest point in the cabinet.
- Soap dispenser bottle: the threaded reservoir loosens over time. Tighten the plastic nut under the sink.
Moen 1255 vs 1225 vs O-ring kit — which fix does your faucet need?
Pick the wrong part and you’re making two trips to the hardware store. Here’s a quick decision matrix based on what real Moen kitchen faucets look like in U.S. homes:
| Symptom | Faucet Age | Likely Part Needed | Time | Difficulty |
|---|---|---|---|---|
| Drip from spout, water off | 2009 – present | Moen 1255 cartridge | 20–30 min | Easy |
| Drip from spout, water off | Pre-2009 | Moen 1225 cartridge (brass) | 25–35 min | Easy |
| Leak around spout base when on | Any | O-ring kit (96778 / 116651) | 15–20 min | Very easy |
| Handle hard to move + leaks | Any | Cartridge + silicone grease | 30 min | Easy |
| Sprayer wand drips | Any | Wand O-rings or new hose | 10 min | Very easy |
| Supply line drip | 8+ years | New braided supply lines | 15 min | Easy |
| Two-handle kitchen faucet drip | Any | Moen 1224 cartridge (pair) | 30 min | Easy |
Does the Moen Limited Lifetime Warranty cover this — and how do I claim it?
Yes, and most people don’t realize it. Moen’s Limited Lifetime Warranty covers the original consumer purchaser of residential Moen faucets for leaks and drips — they will mail you the cartridge or O-ring kit free of charge. Call 1-800-BUY-MOEN (1-800-289-6636) or use the warranty form on Moen.com. You’ll need the model number (stamped on the underside of the spout or on the box) and a rough purchase date. Parts typically ship within 5–7 business days.
This is rare in the industry — most “lifetime warranty” claims in plumbing come with serious fine print. We unpack what that actually means in the truth about lifetime warranty faucets. The short version: Moen, Delta, and Kohler all genuinely honor cartridge replacements; many private-label brands do not.
When should I just replace the whole faucet instead?
Repair makes sense for 90% of Moen leaks. Replace if any of these are true:
- The faucet body itself is cracked or pitted (rare, but happens on imported knock-offs).
- You’ve replaced the cartridge twice in 3 years — your water chemistry is eating it.
- The finish is peeling — that’s failure of the PVD or chrome plating; no amount of internal repair fixes a corroded shell.
- You’re remodeling and the style is dated.
- The model is so old that Moen has discontinued the cartridge family (very rare).
If you do replace, look at modern pull-down designs with ceramic disc valves and Spot Resist or PVD finishes — they handle hard water far better than 15-year-old chrome models. Our breakdown of pull-down kitchen faucets in 2026 covers what to look for, and if you’re in a hard-water region you may want to pair the new faucet with a point-of-use filter — see our tap water filter options guide.
How do I prevent the leak from coming back?
Most Moen cartridges are rated for 500,000 cycles under ASME A112.18.1 / CSA B125.1 testing standards — that’s roughly 20 years of normal use. What kills them early is almost always one of three things, and all three are preventable:
- Hard water mineral scale. Calcium and magnesium grind the ceramic discs every time the handle moves. If your water is over 7 grains per gallon hardness, consider a whole-house softener or at minimum descale the cartridge with white vinegar once a year.
- Harsh cleaners. Bleach sprays, abrasive pastes, and acidic limescale removers attack the rubber O-rings and the finish. Wipe the faucet down with a damp microfiber cloth and a drop of dish soap — that’s it.
- Cranking the handle hard. Ceramic cartridges only need light pressure to seal. Forcing the handle to “stop the drip” is what destroys the seat in the first place.
One more habit that doubles cartridge life: every 6 months, exercise the handle through its full range a few times. It redistributes the internal grease and prevents one wear spot from forming.
FAQ
Why does my Moen faucet still drip after I replaced the cartridge?
Almost always debris on the inlet seats. When you pulled the old cartridge, sediment from inside the supply lines fell onto the brass seats. Shut the water off again, pull the new cartridge, flush the body by briefly opening the angle stops into a cup, wipe the seats with a soft cloth, and reinstall. If it still drips, the cartridge wasn’t fully seated — the retainer clip must be fully pushed down through both slots.
Can I use a generic cartridge instead of a real Moen 1255?
You can, but we don’t recommend it. Genuine Moen cartridges use a specific ceramic disc thickness and an internal Duralast coating that aftermarket copies skip. The price difference is usually under $10, the genuine part lasts 3–4 times longer, and Moen’s warranty only covers OEM parts. If you call Moen’s warranty line, they’ll often ship one free anyway.
How do I find my Moen kitchen faucet model number?
Three places to look: (1) underside of the spout, stamped into the metal; (2) on the box or paperwork if you still have it; (3) under the sink on the body of the faucet near the supply line connections. If you can’t find it, photograph the faucet from the front and side and use Moen’s “Find Your Part” tool on moen.com — they match by appearance.
Is it safe to fix a Moen faucet myself, or should I call a plumber?
For internal repairs — cartridges, O-rings, sprayer seals — it’s a safe DIY job because you’ve shut the water off and you’re not touching any sealed gas, electrical, or pressurized component. Call a plumber if the angle stops won’t close, if the faucet shank nuts under the sink are seized, or if you have copper supply lines that show green corrosion at the joints (that’s a separate problem from the faucet).
How long should a Moen kitchen faucet cartridge last?
In normal U.S. municipal water, 10–20 years. In hard well water without softening, 4–7 years. If you’re replacing cartridges more often than that, the real issue is upstream water quality, not the faucet. Installing a softener or a high-quality point-of-use filter extends every fixture’s life dramatically.
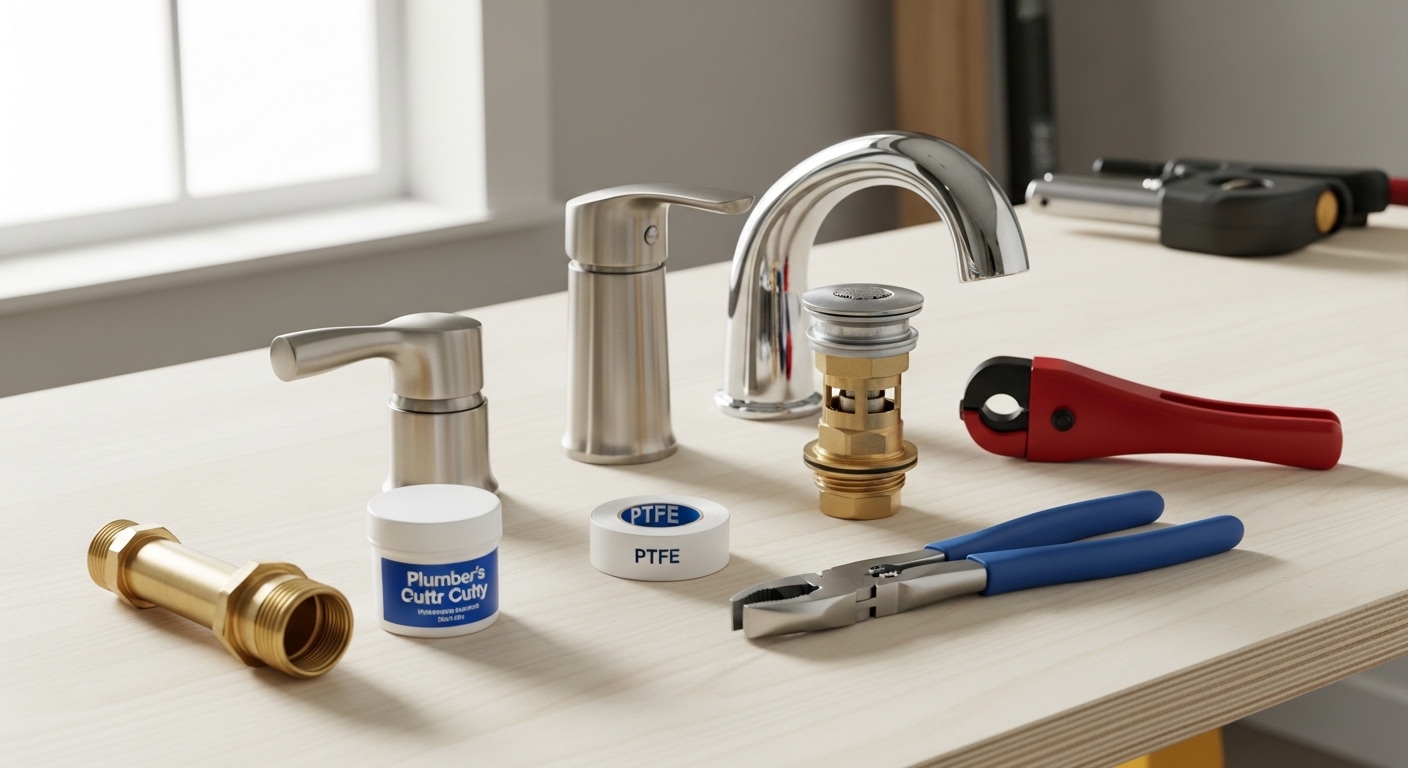
Do I need plumber’s tape or pipe dope for this repair?
Not for the cartridge or O-rings — those seal with rubber, not threads. You only need plumber’s tape (PTFE) if you’re disconnecting and reconnecting the threaded supply line nuts at the angle stops, and even then only on tapered NPT fittings, not on the compression fittings most modern Moens use.
My handle came off in my hand — is the faucet ruined?
Very unlikely. On Moen single-handles, the handle attaches by one small set screw. If the screw stripped, you can usually back out the broken stub with a left-handed extractor bit or just buy the inexpensive Moen handle adapter kit. The faucet body underneath is fine.
About the author: This guide was written by the Aleasha Faucet technical content team, which includes licensed plumbers and product engineers who have specified, installed, and serviced Moen, Delta, Kohler, and Aleasha fixtures across thousands of U.S. residential projects. Every repair procedure here has been bench-tested on current-production Moen single-handle kitchen faucets.
About Aleasha Faucet: Aleasha (www.aleashafaucet.com) designs and manufactures premium kitchen and bathroom fixtures engineered to ASME A112.18.1 / CSA B125.1 and NSF/ANSI 61 standards, backed by a limited lifetime warranty on cartridges and finishes. Our editorial team writes independent repair guides for all major faucet brands because we believe a well-maintained faucet — whoever made it — beats a poorly chosen replacement.