Mounting a faucet directly to a backsplash is a popular choice in both kitchens and bathrooms, especially in farmhouse, commercial, and wall-mounted sink designs. Unlike deck-mounted faucets, backsplash-mounted faucets offer improved clearance, easier cleaning, and a cleaner countertop appearance. While the installation process is slightly different from standard setups, it is completely manageable with the right preparation and tools.
This guide walks you through everything you need to know to mount a faucet to a backsplash correctly, safely, and securely.
What Is a Backsplash-Mounted Faucet?
A backsplash-mounted faucet is installed directly into the vertical surface behind the sink rather than on the sink deck or countertop. The backsplash may be made of tile, stainless steel, stone, or solid surface material. This style is commonly seen in:
-
Farmhouse sinks
-
Utility and laundry sinks
-
Commercial-style kitchens
-
Wall-mounted bathroom sinks
Backsplash mounting keeps water and soap off countertops and provides more usable sink space.
Before You Begin: Key Considerations
Before installing a faucet into a backsplash, take time to verify compatibility and measurements.
1. Faucet Type
Ensure your faucet is designed for backsplash or wall mounting. Deck-mounted faucets are not suitable for vertical installation.
2. Hole Spacing
Most backsplash-mounted faucets use standard hole spacing:
-
4 inches (centerset)
-
8 inches (widespread)
-
Single-hole
Measure carefully to match your faucet to the existing holes.
3. Plumbing Access
Confirm that hot and cold water supply lines are routed behind the backsplash and accessible for connection.
Tools and Materials You’ll Need
Prepare everything before starting to avoid interruptions:
-
Backsplash-mounted faucet
-
Adjustable wrench
-
Basin wrench
-
Plumber’s tape (Teflon tape)
-
Silicone sealant
-
Drill with masonry or tile bit (if drilling new holes)
-
Level
-
Screwdriver
-
Safety glasses
Step-by-Step Guide to Mounting a Faucet to a Backsplash
Step 1: Turn Off the Water Supply
Shut off both hot and cold water valves at the main supply or under the sink. Open the faucet to release residual pressure.
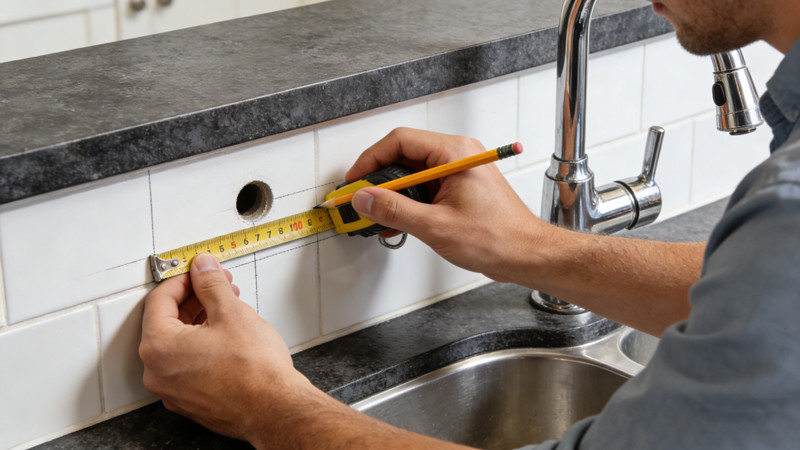
Step 2: Mark and Drill Mounting Holes (If Needed)
If the backsplash does not have pre-drilled holes:
-
Measure and mark hole locations using the faucet base as a template.
-
Use painter’s tape over tile to prevent slipping.
-
Drill slowly using a masonry or tile bit.
-
Avoid applying excessive pressure to prevent cracking.
For stone or tile backsplashes, patience is key.
Step 3: Install the Faucet Body
Insert the faucet stems or mounting shanks through the backsplash holes from the front side. Use a level to ensure the faucet sits straight before tightening.
Secure the faucet using mounting nuts or brackets from behind the backsplash, tightening evenly to prevent stress on the surface.
Step 4: Seal Around the Faucet Base
Apply a thin bead of clear silicone sealant around the faucet base where it meets the backsplash. This prevents water from seeping behind the wall and protects against mold and damage.
Allow the sealant to cure according to manufacturer instructions.
Step 5: Connect Water Supply Lines
Attach the hot and cold supply lines to the faucet inlets:
-
Wrap threads with plumber’s tape
-
Hand-tighten connections
-
Finish tightening with a wrench (do not overtighten)
Ensure lines are not twisted or kinked.
Step 6: Check Alignment and Stability
Once secured, check that the faucet is level and firmly mounted. Slight adjustments should be made before final tightening.
Step 7: Restore Water and Test
Turn the water supply back on slowly. Check for leaks at all connection points and around the faucet base. Run both hot and cold water for several minutes to confirm proper operation.
Common Installation Mistakes to Avoid
-
Overtightening mounting nuts, which can crack tile or stone
-
Skipping silicone sealant, leading to water damage
-
Incorrect hole spacing, causing poor fit
-
Drilling too fast, which can shatter tile
-
Not using a level, resulting in crooked installation
Avoiding these mistakes ensures a professional-quality result.
Backsplash-Mounted vs Deck-Mounted Faucets
| Feature | Backsplash-Mounted | Deck-Mounted |
|---|---|---|
| Counter space | More available | Less |
| Cleaning | Easier | Harder |
| Installation | Moderate | Easy |
| Style | Farmhouse / Commercial | Traditional |
When to Call a Professional
If your backsplash is made of expensive stone, if plumbing lines need to be rerouted, or if drilling into tile feels risky, hiring a licensed plumber is a smart choice. A professional ensures leak-free installation and protects your backsplash investment.
Final Thoughts
Mounting a faucet to a backsplash is a practical and stylish upgrade that improves sink usability and simplifies cleaning. With careful measurements, the right tools, and patience, this installation can be successfully completed by most DIY homeowners. Whether you’re upgrading a farmhouse sink or installing a utility faucet, backsplash mounting delivers both functional and visual benefits that last for years.